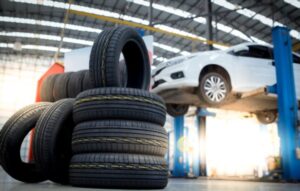
A flat tire occurs when air escapes from the tire and it loses pressure, causing the tire to become deflated. This can happen due to a variety of reasons, such as a puncture from a sharp object like a nail or screw, a damaged valve stem, or a leak in the tire’s sidewall or tread.
To fix a flat tire, you first need to identify the cause of the flat and assess the level of damage to the tire. If the damage is minor, you may be able to repair it using a tire repair kit, which typically includes a tire plug, rasp tool, and plug installation tool. The plug is inserted into the puncture and helps to seal the hole.
However, if the damage is severe or the tire is worn out, it may need to be replaced entirely. When replacing a tire, it’s important to match the new tire to the specifications of the other tires on the vehicle and ensure that it’s properly inflated and balanced.
In order to prevent flats from occurring in the first place, it’s important to maintain proper tire pressure, avoid driving over debris on the road, and regularly inspect your tires for signs of wear and tear. If you do encounter a flat tire while driving, it’s important to pull over to a safe location and address the issue as soon as possible to ensure your safety and prevent further damage to your vehicle.
Here are the basic steps to fix a flat tire:
- Find a safe location: If you realize that you have a flat tire while driving, find a safe place to park your vehicle off the road. This will prevent any accidents or further damage to your car.
- Turn off the engine and engage the parking brake: Once you’ve parked your car, turn off the engine and apply the parking brake. This will ensure that the vehicle is secure and won’t move while you’re fixing the tire.
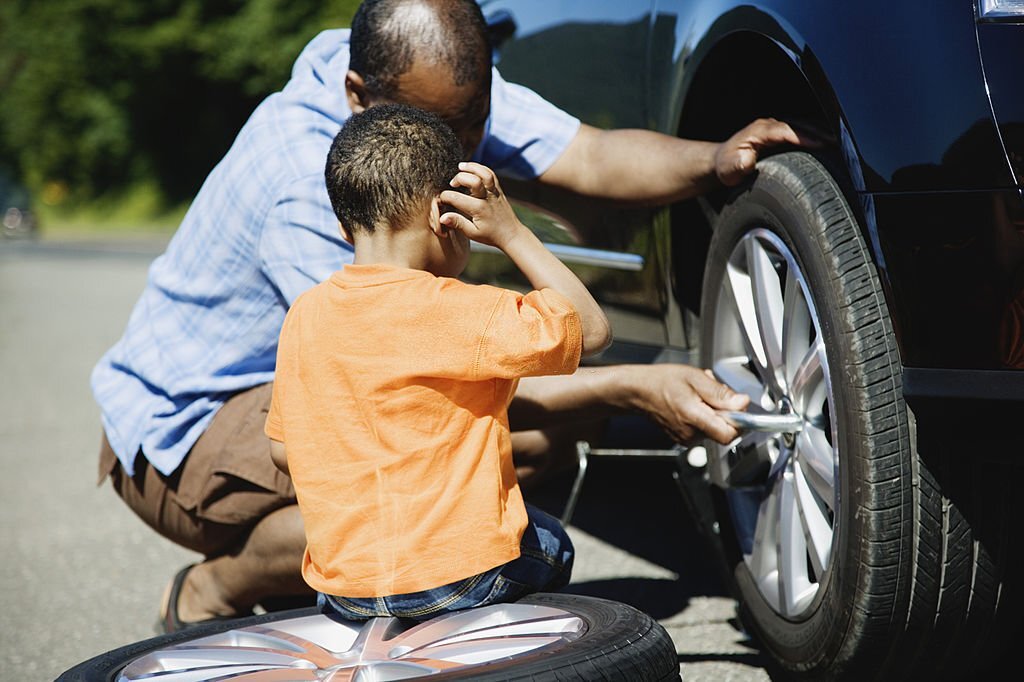
- Remove the flat tire: Use a lug wrench to loosen the lug nuts on the flat tire. Then, jack up the vehicle using a jack stand and remove the lug nuts and the tire.
- Inspect the tire: Check the tire for punctures, cuts, and other signs of damage. If the tire is severely damaged or has a large puncture, it may need to be replaced rather than repaired.
- Repair the tire: If the puncture is small and can be repaired, use a tire repair kit to fix the hole. Insert the plug into the puncture and use a rasp tool to ensure the plug is secure.
- Reinstall the tire: After you’ve repaired the tire, reinstall it onto the vehicle and tighten the lug nuts.
- Lower the vehicle: Use the jack stand to lower the vehicle back to the ground and remove the jack stand.
- Check the tire pressure: Check the tire pressure using a tire pressure gauge to ensure it’s at the proper level.
- Test the tire: Take the car for a short drive to ensure the tire is properly repaired and that the vehicle is driving normally.
If you’re not comfortable fixing a flat tire on your own, it’s best to seek assistance from a professional tire technician.
What are safe spots to fix a flat tire?
When you need to fix a flat tire, it’s important to find a safe location to do so. Here are some safe spots to fix a flat tire:
- The side of the road: If you have a flat tire while driving, pull over to the side of the road in a safe location, such as a wide shoulder or rest area. Make sure your car is completely off the road and away from traffic.
- A parking lot: If you’re in a parking lot or garage, find an empty space or a designated repair area to fix your tire. Avoid blocking other vehicles or parking in a fire lane or other restricted area.
- Your driveway or garage: If you have a flat tire at home, you can fix it in your driveway or garage. Make sure you have enough space to work safely and avoid blocking any other vehicles or obstructing any driveways or sidewalks.
- A tire repair shop: If you don’t feel comfortable fixing the tire yourself or don’t have the necessary tools or equipment, take your vehicle to a nearby tire repair shop. They will have the expertise and tools needed to safely fix your flat tire.
It’s important to always prioritize your safety when fixing a flat tire. If you’re in an unsafe location or don’t feel comfortable fixing the tire yourself, seek help from a professional or call for roadside assistance.
Do I need to turn off my engine to fix a flat tire?
Yes, it’s recommended to turn off your engine when fixing a flat tire. This is for safety reasons, as it’s important to avoid any movement of the vehicle while you’re working on the tire. When you turn off the engine, engage the parking brake to ensure the vehicle is secure and won’t move while you’re fixing the tire.
Additionally, turning off the engine allows you to hear any noises or sounds that might indicate a problem with the tire or the vehicle. This can help you identify any issues and address them promptly.
It’s important to always prioritize safety when fixing a flat tire. If you’re unsure about how to safely repair the tire or don’t have the necessary tools or equipment, seek help from a professional or call for roadside assistance.
How do you use a car jack?
Using a car jack can be intimidating for some people, but with the right instructions and precautions, it can be done safely and easily. Here are the basic steps to use a car jack:
- Find a safe location: Before using a car jack, find a flat, level surface to park your vehicle on. Make sure you’re in a safe location away from traffic and that the ground is sturdy enough to support the weight of the vehicle.
- Locate the jack points: Look for the jack points under your vehicle. These are usually located behind the front wheels and in front of the rear wheels. Consult your vehicle’s owner’s manual to find the exact location of the jack points.
- Position the jack: Position the jack under the designated jack point and make sure it’s securely in place. The flat part of the jack should be directly beneath the jack point.
- Raise the jack: Use the jack handle or crank to raise the jack slowly and steadily. Make sure the jack is lifting the vehicle straight up and not at an angle, which can be dangerous.
- Secure the vehicle: Once the vehicle is lifted, place jack stands under the designated jack points to support the vehicle. This is important for safety, as the jack can fail and cause the vehicle to fall if it’s not properly supported.
- Lower the jack: Once the vehicle is securely on the jack stands, lower the jack slowly and carefully. Make sure the vehicle is stable before removing the jack.
- Remove the jack: Remove the jack from under the vehicle and store it safely.
It’s important to always follow the manufacturer’s instructions when using a car jack and to prioritize safety. If you’re unsure about how to use a car jack safely, seek help from a professional or consult your vehicle’s owner’s manual.
How to check for tire punctures?
Checking for tire punctures is an important part of tire maintenance and can help prevent flat tires and other issues on the road. Here are the steps to check for tire punctures:
- Inspect the tire: Start by visually inspecting the tire for any obvious signs of damage, such as cuts, tears, or punctures. Look for any foreign objects that may be lodged in the tread or sidewall of the tire.
- Check for leaks: If you suspect a puncture, check for any leaks by spraying a soapy water solution onto the tire. Look for bubbles forming at the site of the puncture.
- Use a tire pressure gauge: Use a tire pressure gauge to check the pressure of the tire. If the pressure is lower than it should be, it could be a sign of a puncture.
- Listen for any hissing sounds: Listen carefully for any hissing sounds coming from the tire, which could indicate air escaping from a puncture.
- Check the inner lining: If you’re still unsure whether there is a puncture, remove the tire and inspect the inner lining of the tire for any signs of damage.
If you do find a puncture, it’s important to have it repaired as soon as possible by a professional tire technician. Driving on a flat or damaged tire can be dangerous and cause further damage to your vehicle. Regularly inspecting your tires for punctures and other damage is an important part of tire maintenance and can help keep you safe on the road.
How to check the tire pressure?
Checking tire pressure is an important part of regular vehicle maintenance and can help prevent accidents, extend the life of your tires, and improve fuel efficiency. Here are the steps to check your tire pressure:
- Check the recommended tire pressure: Locate the recommended tire pressure for your vehicle. This information can be found in your vehicle’s owner’s manual, on a sticker located in the driver’s side doorjamb, or on the tire itself.
- Obtain a tire pressure gauge: Purchase a tire pressure gauge from an auto parts store or online retailer. Make sure the gauge is compatible with the valve stem on your tires.
- Remove the valve cap: Unscrew the valve cap from the valve stem on your tire.
- Press the gauge onto the valve stem: Press the gauge onto the valve stem until you hear a hissing sound, indicating that air is flowing out of the tire and into the gauge.
- Read the pressure: Wait a few seconds for the gauge to register the pressure and then read the pressure in PSI (pounds per square inch). Repeat this process for each tire on your vehicle.
- Adjust the pressure: If the pressure is too low, use an air compressor to add air to the tire until it reaches the recommended pressure. If the pressure is too high, use the gauge to release air until it reaches the recommended pressure.
- Replace the valve cap: Once you’ve checked and adjusted the tire pressure, replace the valve cap.
It’s important to check your tire pressure regularly, at least once a month, and before long trips. Underinflated or overinflated tires can affect vehicle handling, tire wear, and fuel efficiency, so maintaining proper tire pressure is crucial for safe and efficient driving.
How long can you drive with a spare tire?
It’s generally recommended that you drive with a spare tire for no more than 50-70 miles and at a maximum speed of 50 mph. This is because spare tires, also known as “donut” tires, are not designed to be driven on for long periods of time and are meant to be temporary solutions to get you to a tire repair shop.
Spare tires are typically smaller than your regular tires and have less traction, which can affect handling and stability on the road. They also have a shorter lifespan than regular tires and can become damaged more easily.
It’s important to get your regular tire repaired or replaced as soon as possible and to avoid using a spare tire for an extended period of time. If you need to drive more than 50-70 miles on a spare tire, consult your vehicle’s owner’s manual for specific guidelines and consider having the tire inspected by a professional tire technician before continuing your journey.